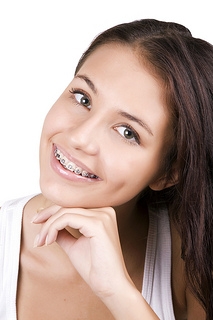
Welcome to the official blog of Dr. Elizabeth Spannhake and Spannhake Orthodontics. This blog will keep you posted on office news, contests and events, education information and just the fun things that happen along the way.
Friday, April 28, 2017
Fluoride During Orthodontic Treatment | Is It Important?
Spannhake Orthodontics wants you to know that there are several ways you can protect your smile throughout your orthodontic treatment. If you follow the rule of thumb and brush your teeth twice a day, floss often, and protect your appliances from damage, your treatment should be very successful.
One thing we’d like to add, is did you know there is another way to keep your teeth healthy and bright during your treatment with braces?
How is this possible? One word: fluoride. Fluoride is the mineral that helps prevent cavities and tooth decay. This mineral also helps keep your teeth strong. Fluoride comes in two varieties: topical and systemic. Depending on your oral health or the recommendation of Dr. Spannhake, you may be required to have a fluoride treatment every three, six, or 12 months.
If you have any other questions about fluoride or your orthodontic treatment, please don’t hesitate to give Spannhake Orthodontics a call!
Friday, April 14, 2017
Fun Spring Activities
Spring is in the air! As the flower buds are peeking out and birds are starting to chirp, it's time to leave those thoughts of snowstorms behind. Spring can be a wonderful time to explore the outdoors or go for a walk around town. Get your family moving together and establish some healthy habits, away from the electronics indoors.
We have 5 fun ideas to get you in the mood for the loveliest season of the year.
1. Dust off the sports gear. Find a kick a ball, throw a Frisbee, shoot hoops, whatever sports activity that you and your family enjoy doing.
2. Get dirty in the yard. Mow the grass. Pull weeds. Till flower beds. Replant. Cut back. Find the fun in getting sweaty, and teach your kids how to manage the landscaping while you do it.
3. Explore the outdoors. Hike a trail and check out the plants budding out of the ground.
4. Go to a baseball game. The beginning baseball season is one of the annual markers that warm weather is just around the corner. If you don't have it in your budget for pricey pro tickets, look into local league games, college, or even high school games to watch.
5. Make Something. Whether you're experimenting with a new recipe or creating a new craft, making something new will give your kids a sense of satisfaction.
After being cooped up all winter, everyone's ready for some fresh Spring air. We hope you will step into the warm weather with suggestions of fun activities for the entire family.
Friday, April 7, 2017
Protect Your Braces
Mouthguards can be custom made for your mouth by your dentist or orthodontist. However, if you can’t afford a custom-made mouthguard, you should still wear a stock mouthguard or a boil-and-bite mouthguard from the drugstore.
Protect Your Braces
A properly fitted mouthguard may be especially important for people who wear braces. A blow to the face could damage the brackets or other fixed orthodontic appliances. A mouthguard also provides a barrier between the braces and your cheek or lips, which will help you avoid injuries to your gums and cheeks.
If you're an athlete and a patient at Spannhake Orthodontics, talk to Dr. Spannhake about selecting a mouthguard that will provide the right protection for you. Although some mouthguards only cover the upper teeth, Dr. Spannhake may suggest that you use a mouthguard on the lower teeth if you have braces on these teeth.
Also, be sure to remember if you have a retainer or other removable appliance, do not wear it during any contact sports. For more information give us a call at 410-857-4700 for our Westminster office or 410-321-5004 for our Towson office.
Monday, April 3, 2017
#SPANNHAKESPRINGBREAK SELFIE CONTEST DETAILS
Enter now until April 30th for a chance to win a mystery prize!
Click here to LIKE Spannhake Orthodontics on Facebook & upload your #SpannhakeSpringBreak selfie.
Friday, March 31, 2017
Picture Perfect Smiles
They say to celebrate good times, right? Well, we wanted to get into that phrase a little more by showcasing some of our patients who are celebrating their new smiles (whether it's freshly in braces or finally out)! At Spannhake Orthodontics our friendly staff develops a relationship with our patients on a more personal level, so our patients aren’t the only ones proud of their smiles but we are too.
Meet some of our patients that are looking picture perfect this month!
Great results don’t just come from our efforts, but they are achieved by a team effort of our patients and staff combined. Are you ready to get the smile of your dreams? Request an appointment for a complimentary initial evaluation now by contacting our office.
Friday, March 24, 2017
Easy Home-Made Pretzel Recipe | Braces Friendly
INGREDIENTS
- 1 package (1/4 oz.) active dry yeast
- 1 1/2 cups warm water (110° to 115°)
- 2 tablespoons sugar
- 2 tablespoons butter, melted
- 1 1/2 teaspoons salt
- 4 to 4 1/2 cups all-purpose flour
- 8 cups water
- 1/2 cup baking soda
- 1 egg yolk
- 1 tablespoon cold water
- Coarse salt, optional
- In a large bowl, dissolve yeast in warm water. Add the sugar, butter, salt and 2 cups flour. Beat until smooth. Stir in enough remaining flour to form a soft dough (dough will be sticky).
- Turn dough onto a floured surface; knead until smooth and elastic, about 6-8 minutes. Place in a greased bowl, turning once to grease top. Cover and let rise in a warm place until doubled, about 1 hour.
- In a large saucepan, bring 8 cups water and baking soda to a boil. Punch dough down; divide into 12 portions. Roll each into a log and then make into a regular pretzel shape. Add to boiling water, a few at a time, for 30 seconds. Remove with a slotted spoon; drain on paper towels.
- Place on greased baking sheets. Lightly beat egg yolk and cold water; brush over pretzels. Sprinkle with the salt. Bake 425° for 9-11 minutes or until golden brown. Remove from pans to wire racks.
Wednesday, March 15, 2017
More On Retainers
Several patients underestimate the importance of wearing their retainers after their braces come off, but it’s actually one of the most critical post care practices to keep your teeth straight. After all the time, money, and energy spent on braces, why spend all that when you don't plan to keep them straightened after treatment?
What is a retainer?
A retainer keeps teeth from moving back to the positions in which they started before you got braces. There are many different types of retainers—some are removable and some are permanent, some retainers are made of plastic and metal, and some are all plastic or all metal.
How long do you need to wear your retainer?
If you've been given a removable retainer by Dr. Spannhake you may be wondering how long you need to wear it. It takes time for your tissues and bones around your teeth to reorganize and set into place after braces treatment.
The amount of time you’ll need to wear your retainer depends on your unique situation, but typically, retainers should be worn at least as long as the time you spent in braces. You might need to wear them full-time for a while, and then transition to wearing them only at night. Dr. Spannhake will have a treatment plan especially for you, and if you stick to it, you'll always have a straight smile.
Friday, March 10, 2017
Learn More On Adjusting To Braces
Are you a new patient at Spannhake Orthodontics? You may or may not be excited about wearing your braces, but regardless we know you will be thrilled with the result of your new smile. As with any change, adjusting to something new can be a little confusing and overwhelming sometimes, so we decided to help you out with a few tips on adjusting to your braces.
The first tip is to give yourself some time. Your braces may not be what you expected or wanted, but after a while when your teeth start shifting you will notice how incredible your teeth and smile alignment look. Pain may occur after your appointments, just give it a few days after each adjustment and you should feel more comfortable.
Another thing to remember is to be confident. Don't worry about how your braces look and don't be afraid or embarrassed to smile with your braces. Depending on the type of braces you're treated with, people may not even know you're wearing braces. Be proud and flash those pearly whites often!
Lastly, be sure you know what to do if you're experiencing pain or problems with your braces. Before you leave checkups, feel for any wires poking out so you can have us correct the agitation and avoid pain. If a problem arises after your appointment, don't be afraid to call us; chances are it's a simple fix. For more information about adjusting to your braces, visit our website or give us a call.
Wednesday, March 1, 2017
7&Up
New MARCH contest alert! Enter at your next appointment! #SpannhakeOrthodontics
The American Association of Orthodontists recommends that all children should have an orthodontic evaluation by age 7. An experienced orthodontist can clearly see by age seven whether developmental issues can turn into problems. Early detection of common orthodontic problems such as crowding, premature loss of baby teeth, cross bites or many other unfavorable developmental issues can lead to the implementation of the most appropriate treatment that can result in a shorter course of therapy.
Frequently, early intervention will not be necessary, except for careful monitoring of your child’s dental development. This will give you peace of mind when it is not clear to you whether an issue you see is really a problem or just a stage of development that doesn’t require intervention. For more information about this contact Spannhake Orthodontics.
Friday, February 24, 2017
New UNICORN ICE CREAM Recipe
Are you ready for the most magical Ice Cream recipe you’ll ever find? Not only is it cute, but it’s great for all ages. Best of all, it's braces friendly & taste buds approved! Unicorn Ice Cream is magic on a cone!
UNICORN ICE CREAM
UNICORN ICE CREAM
INGREDIENTS
- 2 cups whipping cream
- One 14 sweetened condensed milk
- Electric Blue
- Electric Green
- Egg Yellow
- Magenta
- Purple
- Star Sprinkles
- Purple Disco Dust (optional)
- Green Disco Dust (optional)
- In a large mixing bowl, beat the whipping cream until medium peaks form.
- Pour the can of sweetened condensed milk into the whipped cream, and fold the whipped cream and condensed milk together until completely combined.
- Separate the ice cream base into 5 bowls. Add 2-4 drops of food coloring to each bowl (1 color per bowl). Use a spoon to mix in the food coloring until it is evenly distributed in the ice cream base. You can add more food coloring as needed to reach your desired color.
- Using a standard loaf pan, layer the ice cream. Place ½ of each color in the pan in big dollops. (I layered the blue, green, and purple first, and then the yellow and pink on top of that.) Then repeat the color layering.
- Run a butter knife through the ice cream a few times in each direction to swirl the colors together. You don't want to completely mix the colors, just swirl them a bit.
- Top the ice cream with star sprinkles and sprinkle with disco dust. Because everyone knows unicorns are glittery.
- Cover the loaf pan with plastic wrap and freeze for 8 hours to overnight, or until the ice cream has set up.
Friday, February 17, 2017
NEW OFFICE CONTEST!
Valentine's Day may be over, but our contest isn't! Can you guess how many sweethearts are in the jar? Visit Spannhake Orthodontics to see the jar & take your guess for a chance to WIN an amazing prize!#SpannhakeOrthodontics
Friday, February 3, 2017
Stacked Quesadilla Tower For Super Bowl Sunday
In this stacked tower quesadilla recipe, stack tortillas with black beans, squash, and plenty of cheese, and more.
Ingredients (4 SERVINGS)
- 4 8-inch-diameter flour tortillas
- 1 8-ounce package peeled chopped butternut squash, cut into 1/2- to 3/4-inch cubes
- 2 tablespoons vegetable oil, divided
- 1 cup chopped white onion
- 1 15- to 16-ounce can black beans, rinsed, drained
- 1/2 cup salsa, divided
- 2 garlic cloves, chopped
- 1 teaspoon chili powder
- 1 cup coarsely grated hot pepper Monterey Jack cheese
- 1/4 cup chopped fresh cilantro
- Sour cream
- Additional salsa
- Fresh cilantro sprigs (for garnish)
- Choice of Meat (optional)
- Preheat broiler. Put tortillas in single layer on baking sheet. Brush with oil. Broil until toasted, about 3 minutes. Turn; set aside.
- Place squash in microwave-safe bowl. Sprinkle water over, cover with plastic wrap, and microwave until just tender, about 3 minutes; drain. Heat 1 tablespoon oil in large nonstick skillet over medium-high heat. Add onion and sauté until beginning to brown, about 3 minutes. Add squash; stir 1 minute. Season with salt and freshly ground black pepper. Spread out squash in even layer over 1 tortilla. Add 1 tablespoon oil to skillet. Add beans, 1/4 cup salsa, garlic, and chili powder. Using potato masher, crush until beans are coarsely mashed; season with salt and pepper. Stir in 1/4 cup salsa. Spread over second tortilla. Sprinkle cheese over third tortilla. Leave fourth tortilla plain.
- Broil tortillas until cheese melts and vegetables are browned in spots, about 3 minutes, watching to prevent burning. Transfer black bean tortilla to plate; sprinkle 1/4 cup chopped cilantro over. Top with cheese tortilla, squash tortilla, then plain tortilla. Cut into 4 wedges. Garnish with sour cream, salsa, and cilantro sprigs.
Thursday, January 26, 2017
What is Invisalign & Why Should You Consider It?
Invisalign uses a series of invisible, removable, and comfortable aligners that no one can tell you're wearing. So, you can smile more during treatment as well as after. Invisalign is made with 3D computer imaging technology and has been proven effective. More than 70% of orthodontists in the US and Canada are certified to treat with Invisalign, including Dr. Spannhake.
Why should you consider it?
Not only are the aligners invisible, they are removable, so you can eat and drink what you want while in treatment. Plus, brushing and flossing are no problem. They are also comfortable, with no metal to cause mouth abrasions during treatment. And no metal and wires usually means you spend less time in your doctor's office getting adjustments. Invisalign also allows you to view your own virtual treatment plan when you start so you can see how your straight teeth will look when your treatment is complete. Curious about Invisalign for your teens? Ask us about Invisalign Teen at Spannhake Orthodontics.
Subscribe to:
Posts (Atom)